
When setting up the final heist at Cayo Perico there are a range of Support Crew options that you can purchase. Some are more useful than others and it all depends on the strategy you take.
Our video above shows you them all in action.
Let’s go through them all in order of how useful they are and weigh up the pros and cons of using them.
Weapon Stash (Velum only – essential for stealth)
You only need to use this option if you’re using the Velum approach vehicle. Unlike all the other options, you don’t need to disable the Control Tower to enable it.
When selected your weapons will be inside the airstrip hangar waiting for you meaning that you can start the mission in stealth mode. If you don’t you’ll be immediately detected by the guards and will face a long battle even to reach the inner compound.
Supply Drop (most useful)
The Supply Drop is probably the most useful of the Support Crew options. This will immediately land a box containing the mini gun, rocket launcher and sticky bombs at your location. This gives you some serious firepower, particularly if you go into aggressive mode when attempting the heist.
Just be aware that there is a bug where if you enable it when stood right next to a building, such as the Control Tower itself, it will land on top of the building!
Helicopter backup (some value)
The team from Merryweather will fly to your location in a few seconds to provide backup fire against the guards. If you’re still in stealth mode they will just fly about near your location doing nothing. This can be a useful option if you’ve been detected and are facing a large number of guards. It’s also useful to draw the guards’s fire.
Airstrike (some value)
With this option a flare will appear in your hand and you have a few seconds to throw it to the location where you want the airstrike to hit. Too slow and the plane will just fly overhead and the chance is wasted. Too close to you and you’ll be the target!
Once you’ve thrown the flare, the plane will drop a series of bombs in the area immediately around the flare. It’s useful if you want to take out a set of guards, for example in the North Docks around a set of loot, and it’s even possible to stay in stealth mode if the guards don’t spot you in the chaos. You can’t use it inside the compound itself.
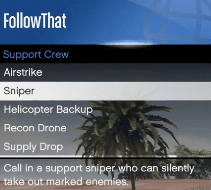
Sniper (limited value)
The sniper will allow you to target guards for the sniper to hit. However, the controls to use it can be fiddly and if you’ve been able to target the guard, then why not just take him out yourself?
You can also be shot at by the guards when targeting them for the sniper…
Recon drone (limited value)
The recon drone allows you to see guards on the map outside of your immediate location. This isn’t particularly useful as the time you need to see the location of the guards is when they are nearby and thus in your map view anyway.
Perhaps it’s of some use to see the attack boats on the water a little further out…
